
Update 2022: Now with support for React v17 and React Fast Refresh
[]()
[](https://github.com/enuchi/React-Google-Apps-Script/issues)
[](https://github.com/enuchi/React-Google-Apps-Script/pulls)
[](/LICENSE)
🚀 This is your boilerplate project for developing React apps inside Google Sheets, Docs, Forms and Slides projects. It's perfect for personal projects and for publishing complex add-ons in the G Suite Marketplace.
---
## 📝 Table of Contents
- [About](#about)
- [Install](#install)
- [Prerequisites](#prerequisites)
- [Getting started](#getting-started)
- [Deploy](#deploy)
- [[New!] Local Development](#local-development)
- [Using React DevTools](#dev-tools)
- [Usage](#usage)
- [The included sample app](#the-included-sample-app)
- [[New!] Typescript](#new-typescript)
- [Adding packages](#adding-packages)
- [Styles](#styles)
- [Modifying scopes](#modifying-scopes)
- [Calling server-side Google Apps Script functions](#calling-server-side-google-apps-script-functions)
- [Autocomplete](#Autocomplete)
- [Authors](#authors)
- [Acknowledgments](#acknowledgement)
## 🔎 About
[Google Apps Script](https://developers.google.com/apps-script/overview) is Google's Javascript-based development platform for building applications and add-ons for Google Sheets, Docs, Forms and other Google Apps.
You can add custom [user interfaces inside dialog windows](https://developers.google.com/apps-script/guides/html), but the platform is designed for simple HTML pages built with [templates](https://developers.google.com/apps-script/guides/html/templates) and [jQuery](https://developers.google.com/apps-script/guides/html/best-practices#take_advantage_of_jquery).
However, using this repo, it's easy to run [React](https://reactjs.org/) apps inside these dialogs, and build everything from small projects to advanced add-ons that can be published on the G Suite Marketplace.

This repo is a boilerplate project that uses React and the same development tools that you use for building traditional websites, all inside Google Apps Script projects.
See below how to get started!
## 🚜 Install
These instructions will get you set up with a copy of the React project code on your local machine. It will also get you logged in to `clasp` so you can manage script projects from the command line.
See [deploy](#deploy) for notes on how to deploy the project and see it live in a Google Spreadsheet.
### Prerequisites
- Make sure you're running at least [Node.js](https://nodejs.org/en/download/) v10 and `npm` v6.
- You'll need to enable the Google Apps Script API. You can do that by visiting [script.google.com/home/usersettings](https://script.google.com/home/usersettings).
- [New!] To use live reload while developing, you'll need to serve your files locally using HTTPS. See [local development](#local-development) below for how to set up your local environment.
### 🏁 Getting started
**1.** First, let's clone the repo and install the dependencies.
```bash
git clone https://github.com/enuchi/React-Google-Apps-Script.git
cd React-Google-Apps-Script
npm install
```
 **2.** Next, we'll need to log in to [clasp](https://github.com/google/clasp), which lets us manage our Google Apps Script projects locally.
```bash
npm run login
```
**2.** Next, we'll need to log in to [clasp](https://github.com/google/clasp), which lets us manage our Google Apps Script projects locally.
```bash
npm run login
```
 **3.** Now let's run the setup script to create a New spreadsheet and script project from the command line.
```bash
npm run setup
```
**3.** Now let's run the setup script to create a New spreadsheet and script project from the command line.
```bash
npm run setup
```
 Alternatively, you can use an existing Google Spreadsheet and Script file instead of creating a new one.
See instructions here for using an existing project.
You will need to update the `.clasp.json` file in the root of this project with the following three key/value pairs (see .clasp.json.SAMPLE for reference):
```json
{
"scriptId": "1PY037hPcy................................................",
"parentId": ["1Df30......................................."],
"rootDir": "./dist"
}
```
- `scriptId`: Your existing script project's `scriptId`. You can find it by opening your spreadsheet, selecting **Tools > Script Editor** from the menubar, then **File > Project properties**, and it will be listed as "Script ID".
- `parentId`: An array with a single string, the ID of the parent file (spreadsheet, doc, etc.) that the script project is bound to. You can get this ID from the url, where the format is usually `https://docs.google.com/spreadsheets/d/{id}/edit`. This allows you to run `npm run open` and open your file directly from the command line.
- `rootDir`: This should always be `"./dist"`, i.e. the local build folder that is used to store project files.
Next, let's deploy the app so we can see it live in Google Spreadsheets.
## 🚀 Deploy
Run the deploy command. You may be prompted to update your manifest file. Type 'yes'.
```bash
npm run deploy
```
The deploy command will build all necessary files using production settings, including all server code (Google Apps Script code), client code (React bundle), and config files. All bundled files will be outputted to the `dist/` folder, then pushed to the Google Apps Script project.
Now open Google Sheets and navigate to your new spreadsheet (e.g. the file "My React Project"). You can also run `npm run open`. Make sure to refresh the page if you already had it open. You will now see a new menu item appear containing your app!

## 🎈 [NEW!] Local Development
We can develop our client-side React apps locally, and see our changes directly inside our Google Spreadsheet dialog window.
 There are two steps to getting started: installing a certificate (first time only), and running the start command.
1. Generating a certificate for local development
Install the mkcert package:
```bash
# mac:
brew install mkcert
# windows:
choco install mkcert
```
[More install options here.](https://github.com/FiloSottile/mkcert#installation)
Then run the mkcert install script:
```bash
mkcert -install
```
Create the certs in your repo:
```
npm run setup:https
```
2. Now you're ready to start:
```bash
npm run start
```
The start command will create and deploy a development build, and serve your local files.
There are two steps to getting started: installing a certificate (first time only), and running the start command.
1. Generating a certificate for local development
Install the mkcert package:
```bash
# mac:
brew install mkcert
# windows:
choco install mkcert
```
[More install options here.](https://github.com/FiloSottile/mkcert#installation)
Then run the mkcert install script:
```bash
mkcert -install
```
Create the certs in your repo:
```
npm run setup:https
```
2. Now you're ready to start:
```bash
npm run start
```
The start command will create and deploy a development build, and serve your local files.
 After running the start command, navigate to your spreadsheet and open one of the menu items. It should now be serving your local files. When you make and save changes to your React app, your app will reload instantly within the Google Spreadsheet, and have access to any server-side functions!
Support for [Fast Refresh](https://github.com/pmmmwh/react-refresh-webpack-plugin) now means that only modified components are refreshed when files are changed, and state is not lost.
After running the start command, navigate to your spreadsheet and open one of the menu items. It should now be serving your local files. When you make and save changes to your React app, your app will reload instantly within the Google Spreadsheet, and have access to any server-side functions!
Support for [Fast Refresh](https://github.com/pmmmwh/react-refresh-webpack-plugin) now means that only modified components are refreshed when files are changed, and state is not lost.
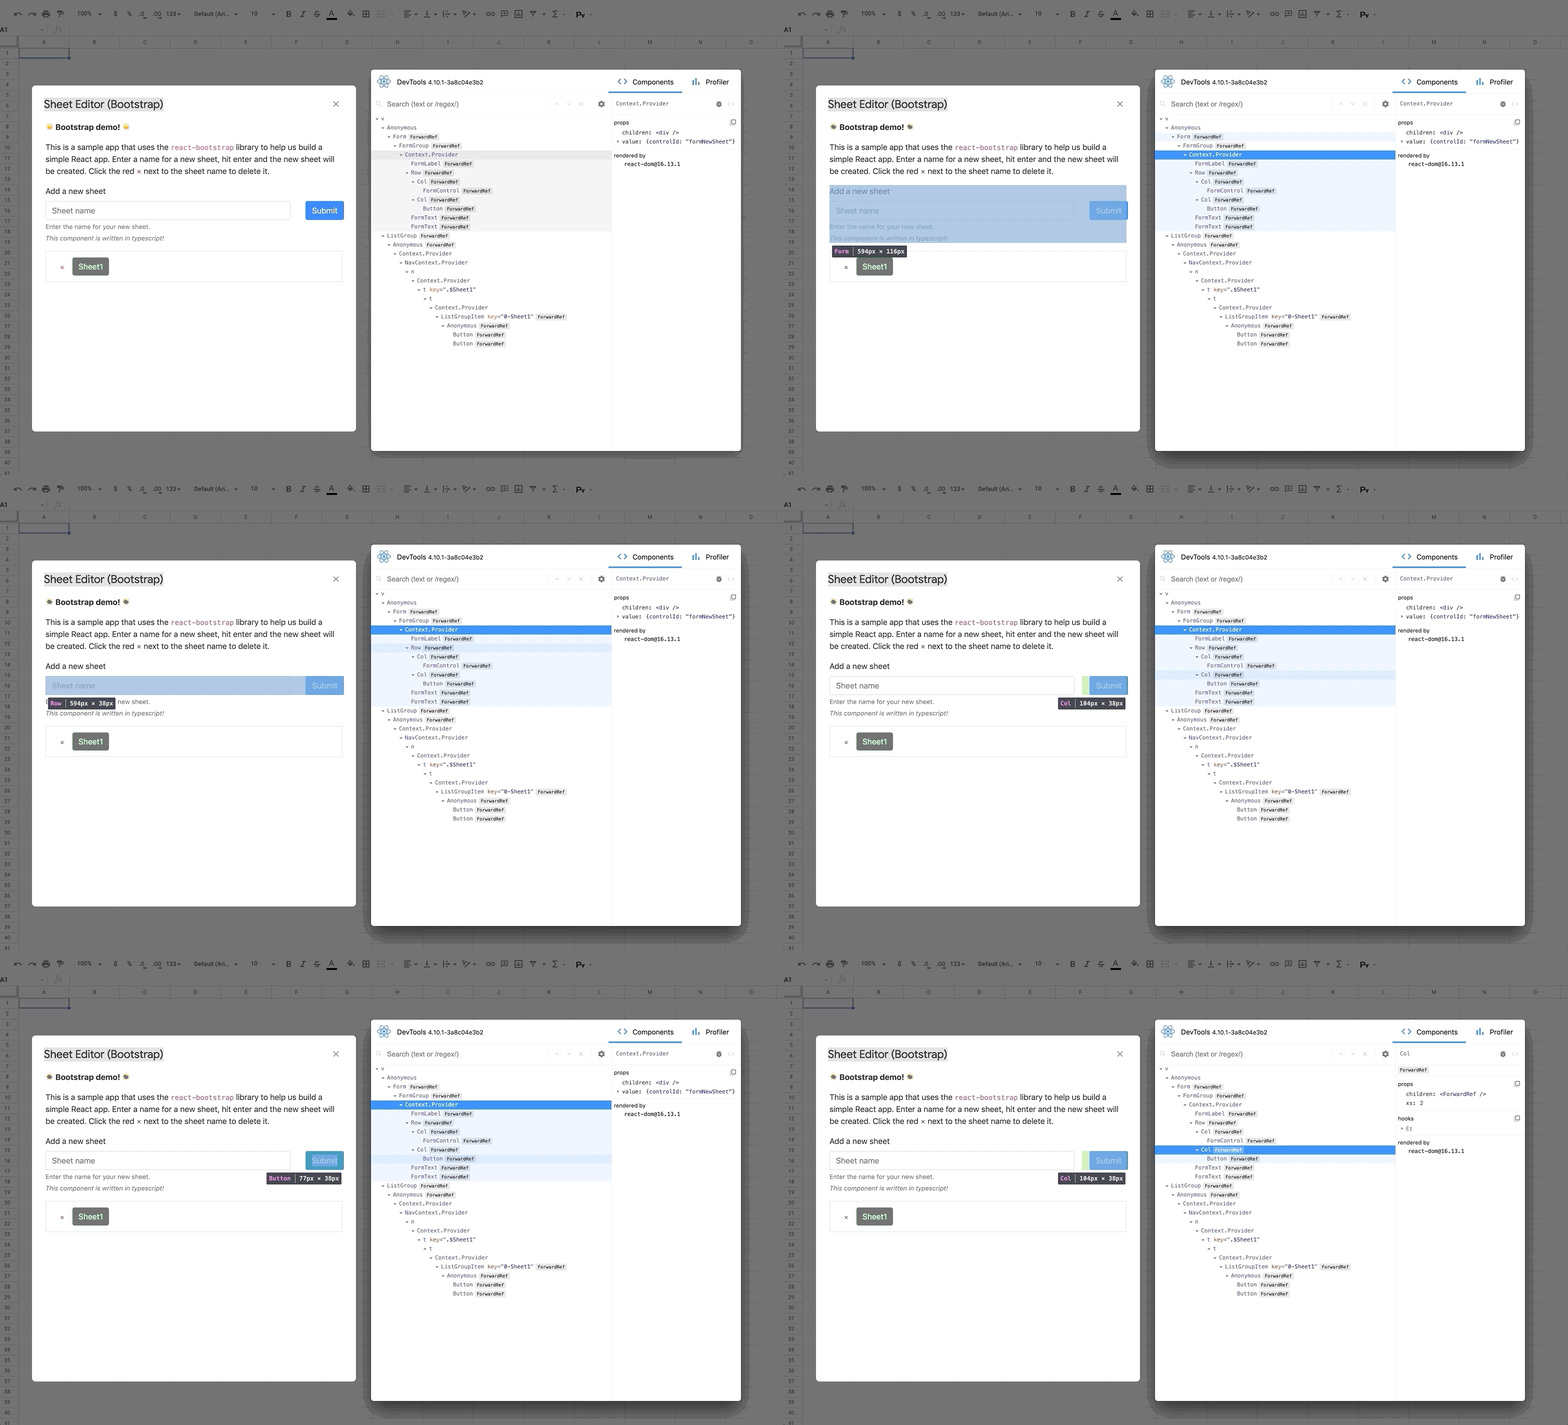
### 🔍 Using React DevTools
React DevTools is a tool that lets you inspect the React component hierarchies during development.
Instructions for installing React DevTools
You will need to use the "standalone" version of React DevTools since our React App is running in an iframe ([more details here](https://github.com/facebook/react/tree/master/packages/react-devtools#usage-with-react-dom)).
1. In your repo install the React DevTools package as a dev dependency:
```bash
npm install -D react-devtools
```
2. In a new terminal window run `npx react-devtools` to launch the DevTools standalone app.
3. Add `` to the top of your `` in your React app, e.g. in the [index.html](https://github.com/enuchi/React-Google-Apps-Script/blob/e73e51e56e99903885ef8dd5525986f99038d8bf/src/client/dialog-demo-bootstrap/index.html) file in the sample Bootstrap app.
4. Deploy your app (`npm run deploy:dev`) and you should see DevTools tool running and displaying your app hierarchy.
 5. Don't forget to remove the `